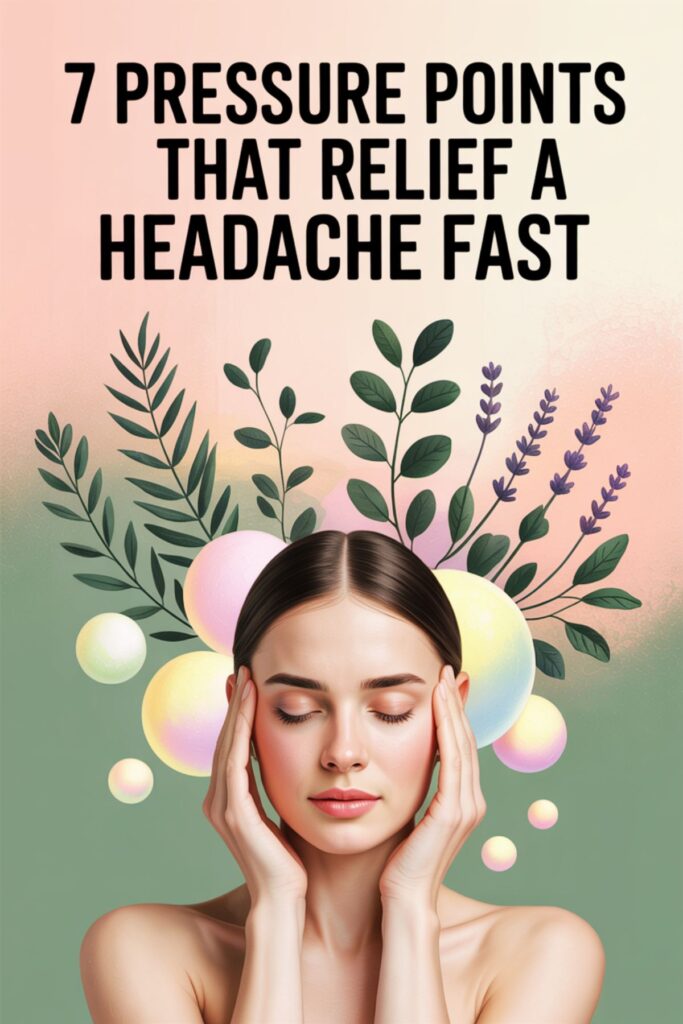
Pressure Points for Headaches: The Complete Guide to Natural Headache Relief
You have a headache, you want it gone, and you want it gone now. These pressure points for headaches and migraine relief work with your own body to shut pain down fast (depending, of course, on the intensity of your headache).
Some of them you can use right at your desk. Some take less than a minute. And when you combine them into the routine at the end of this post, you’ve got a genuine natural headache remedy that works in about 10 minutes.
If you want to go even deeper into natural remedies for headaches, check out 12 Natural Remedies for Fast Headache Relief for a broader toolkit.
A Quick Note on How to Use These Points
Acupressure comes from Traditional Chinese Medicine and has been practiced for thousands of years.
The idea is simple: applying firm, steady pressure to specific points increases circulation, releases muscle tension, and triggers your body’s natural pain response. For headaches and migraines, it can work surprisingly fast when you actually do it right.
Here’s what “doing it right” looks like:
- Use your thumb or index finger, apply firm circular pressure, and hold for 30 to 60 seconds per point. You should feel a dull ache or pressure at the spot; that’s how you know you’ve found it. It shouldn’t feel sharp.
- Repeat each point 2 to 3 times for best results.
- Optional: use a little bit of essential oils when applying pressure. If you are going to use them, make sure to read our post about essential oils for headaches to know which ones are the best for which points.
Now, the points.
LI4: The Pressure Point Everyone Should Know
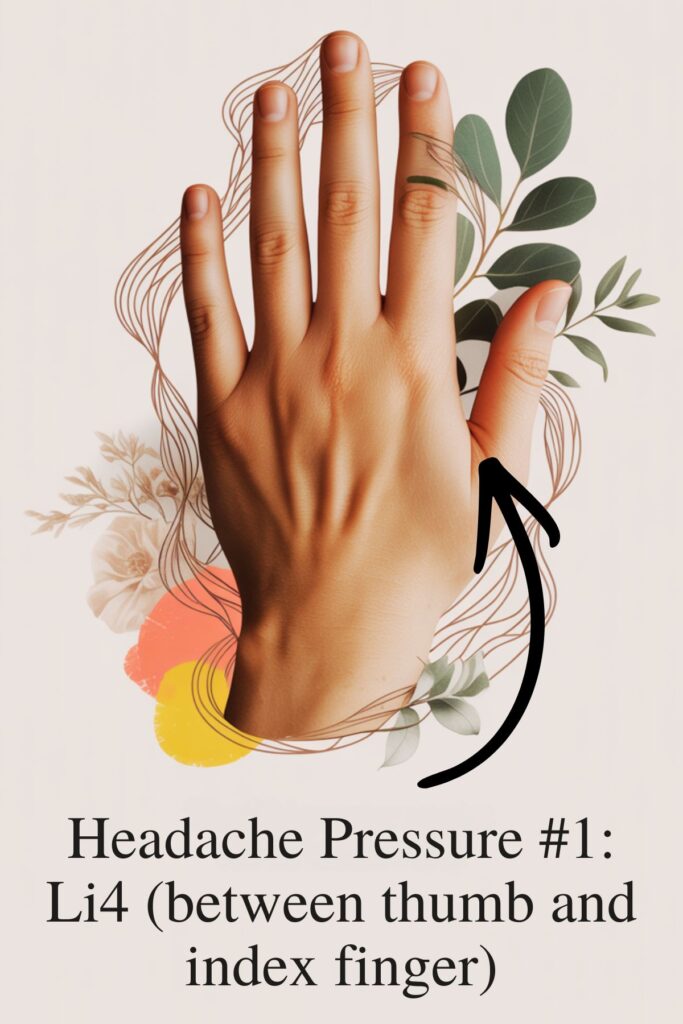
Also called Large Intestine 4 or Hegu, this is the go-to headache pressure point and for good reason. It lives in the fleshy webbing between your thumb and index finger, and it’s one of the most studied acupressure points for pain relief in existence.
How to find it: Pinch the webbing between your thumb and index finger with the opposite hand. The point is at the highest part of that muscle when you press your fingers together.
How to use it: Press firmly and do slow circles for 30 to 60 seconds. Switch hands. It can feel intense, and that intensity is actually a good sign.
Before pressing, apply a small amount of diluted peppermint oil to the webbing first. The menthol creates a cooling sensation that enhances the pain-relieving effect right at the source. Mix 2 drops of peppermint essential oil with 1 teaspoon of fractionated coconut oil and keep it in a little rollerball for headache emergencies. You can find peppermint essential oil here.
Best for: Tension headaches, frontal headaches, sinus headaches, and migraine pain. Also great for stress, which is one of the biggest headache triggers anyway.
One important note: skip this point if you’re pregnant, as it can stimulate contractions.
You can also use an acupressure tool if you’d rather not tire out your fingers. You can find one here.
GB20: The Base-of-Skull Point That Stops Tension Headaches Cold
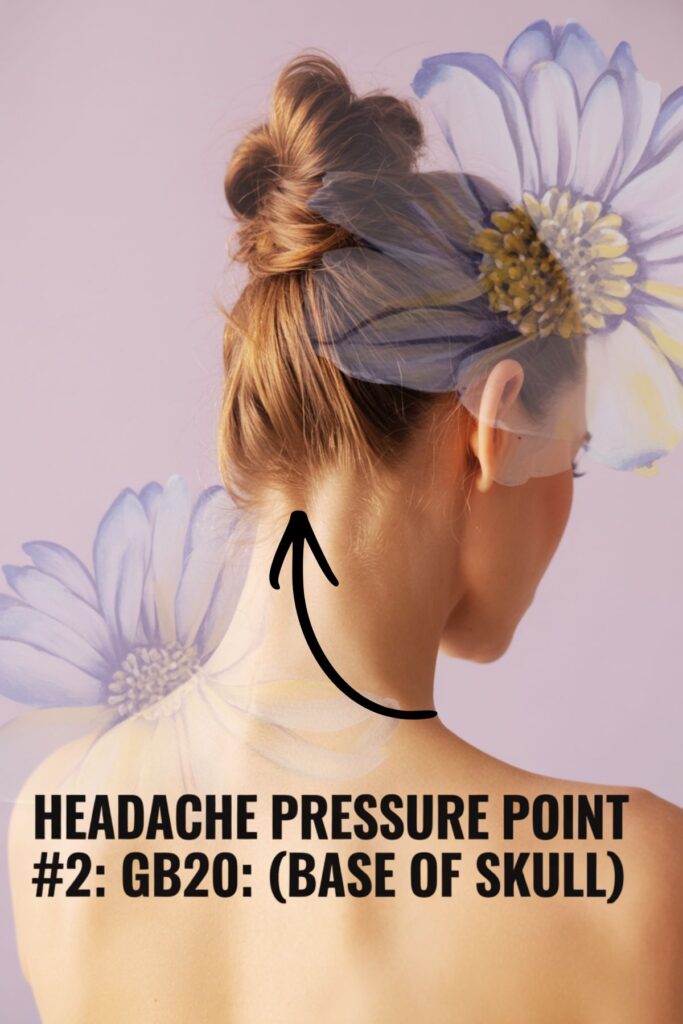
Gallbladder 20, or Feng Chi, is one of the most effective migraine pressure points most people have never heard of. It sits at the base of your skull, in the two hollows on either side of your spine where your neck muscles meet your skull.
How to find it: Tilt your head back slightly and use both thumbs to feel along the base of your skull. You’re looking for two slight indentations on either side of your spine, about two inches apart.
How to use it: Press both sides simultaneously, angling the pressure slightly upward toward your skull. Hold for 30 to 60 seconds while breathing slowly. Let your head rest into your hands a little; gravity actually helps here.
Best for: Migraines, tension headaches at the back of the head, headaches from too much screen time or poor posture, and any headache that comes with neck stiffness.
This one is genuinely life-changing if you get the kind of tension headache that creeps up the back of your neck. Try it lying down with a rolled towel under your neck.
GB21: The Shoulder Knot That’s Probably Behind Your Headache
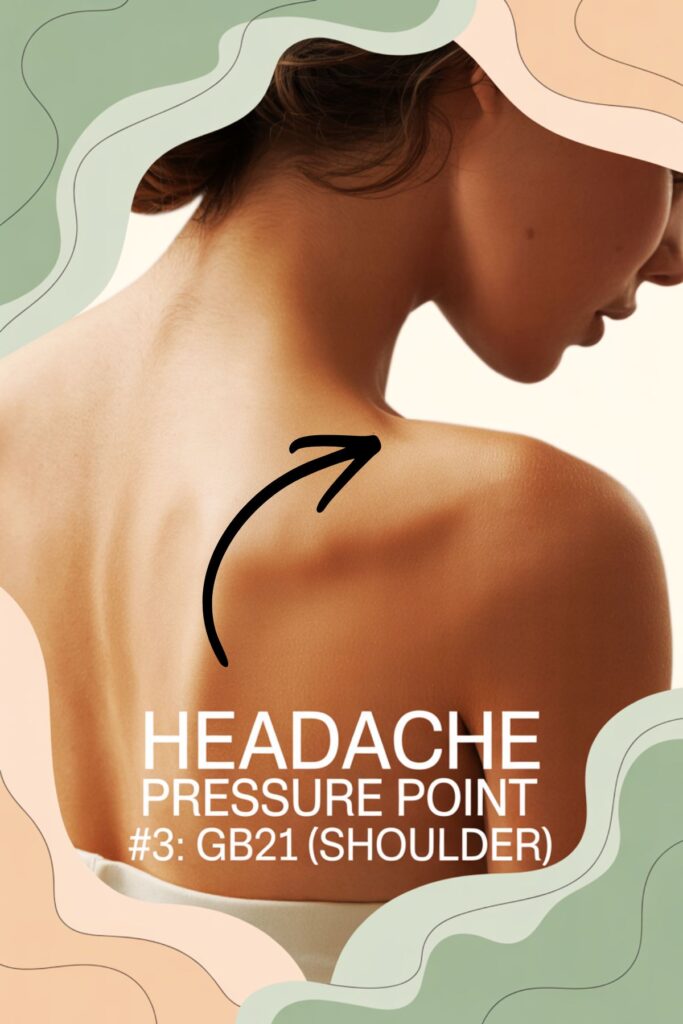
Gallbladder 21, or Jian Jing, is that spot on your shoulder that hurts when someone presses it but also somehow feels amazing. It’s at the highest point of your shoulder, midway between your neck and the edge of your shoulder.
How to find it: Reach across with the opposite hand and squeeze the top of your shoulder muscle. The tenderest point in that area is GB21. You’ll know it immediately.
How to use it: Apply firm downward pressure and hold for 30 to 60 seconds. This one is almost always tender if you carry any stress in your shoulders, which, same.
Best for: Tension headaches, headaches caused by neck and shoulder tightness, stress headaches, and headaches that feel like a band across the top of your head.
Skip this one during pregnancy as well.
ST3: The Sinus Headache Fix You’ve Been Missing
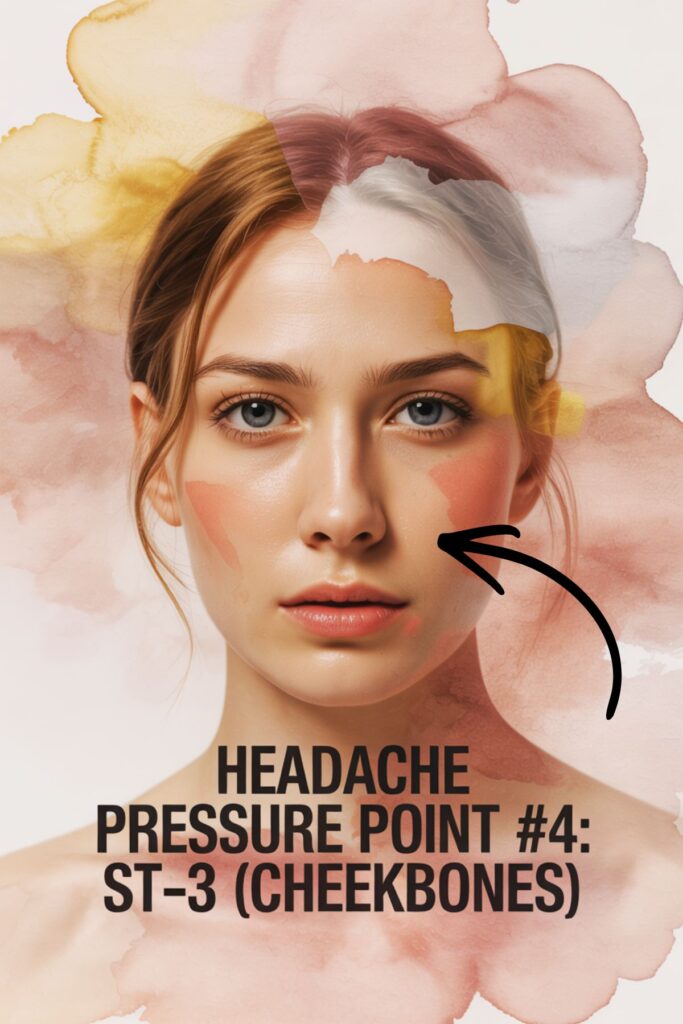
If your headaches come with pressure around your cheekbones or behind your eyes, Stomach 3 is what you need. It sits directly below your pupil, level with the bottom of your nose, just at the top of your cheekbone.
How to find it: Look straight ahead. Drop your finger straight down from your pupil until you feel the top of your cheekbone. Just below that edge is the spot.
How to use it: Use both index fingers simultaneously and apply gentle upward pressure against the cheekbone for 30 seconds. You might feel sinus pressure release almost immediately.
Best for: Sinus headaches, pressure behind the eyes, frontal headaches with congestion, and allergy headaches.
Pair this with a quick steam: a few drops of eucalyptus oil in a bowl of hot water, towel over your head, breathe for 5 minutes. Your sinuses will genuinely thank you.
Yintang: The Third Eye Point for Stress Headaches
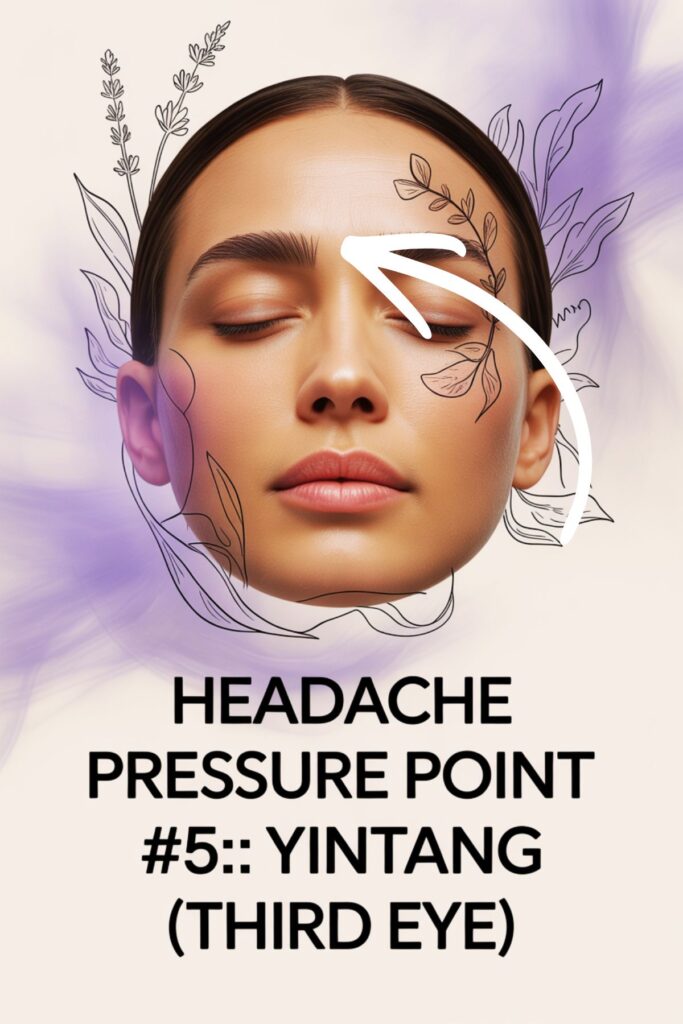
Yintang is right between your eyebrows, that spot people instinctively touch when they’re stressed or overwhelmed, which actually makes a lot of sense. It’s sometimes called the third eye point and it’s one of the most calming headache points on this entire list.
How to find it: Between your eyebrows, midpoint. You genuinely cannot miss this one.
How to use it: Apply gentle but firm circular pressure for 60 seconds. Close your eyes if you can. Breathe slowly. This point has a noticeable effect on the nervous system, which is exactly why it works so well for stress-triggered headaches.
Pro tip: put a tiny drop of diluted lavender oil on your finger before pressing. The combination of the pressure and the scent is incredibly calming and genuinely takes the edge off fast. Find lavender essential oil here.
Best for: Stress headaches, frontal headaches, headaches with anxiety, and tension headaches that start behind the eyes.
LV3: The Foot Point That’s Powerful for Migraines
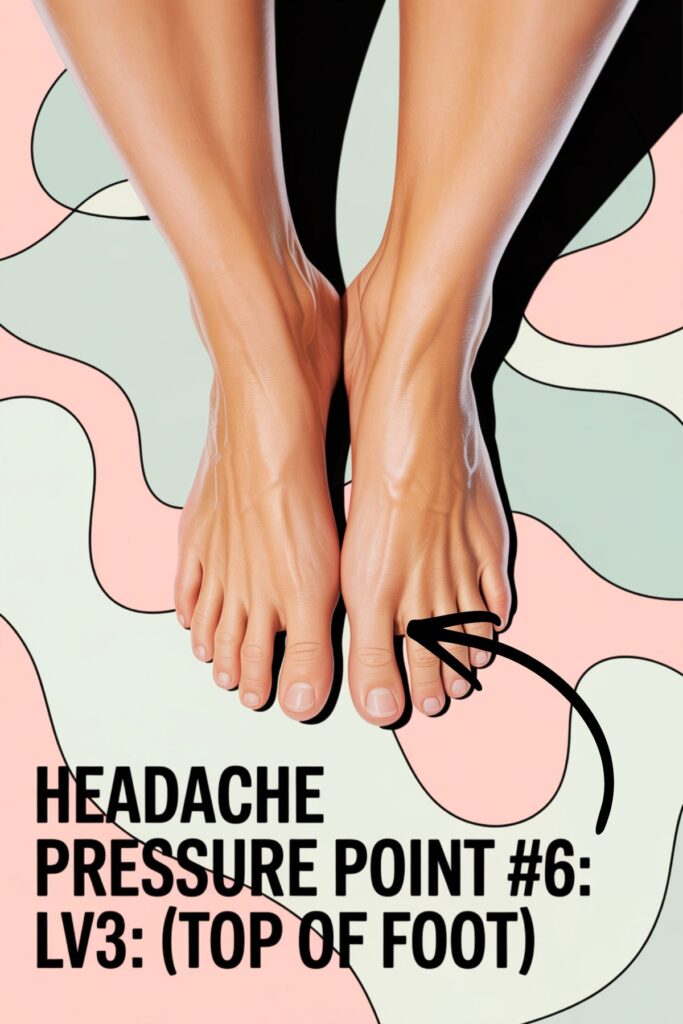
Liver 3, or Tai Chong, doesn’t get nearly the attention it deserves, especially for migraines. It’s on the top of your foot, in the webbing between your big toe and second toe, about two finger-widths back from the edge.
How to find it: Feel along the groove between your big toe and second toe, moving toward your ankle. You’ll land in a slight depression between the bones; that’s the spot.
How to use it: Press firmly with your thumb. This one often feels quite sore, which means it’s working. Hold for 30 to 60 seconds and switch feet.
Best for: Migraines, especially those that come with a migraine aura or visual disturbances, hormonal headaches, and stress-related migraines.
Combining LV3 with LI4 (the hand point) is a classic acupressure pairing called “The Four Gates,” specifically used to move energy and relieve pain throughout the whole body. If you get migraines regularly, this combination is worth making a habit.
For more migraine-specific strategies, The Ultimate Guide to Migraine Relief goes deep on everything from triggers to fast relief options.
P6: For Migraines That Come With Nausea
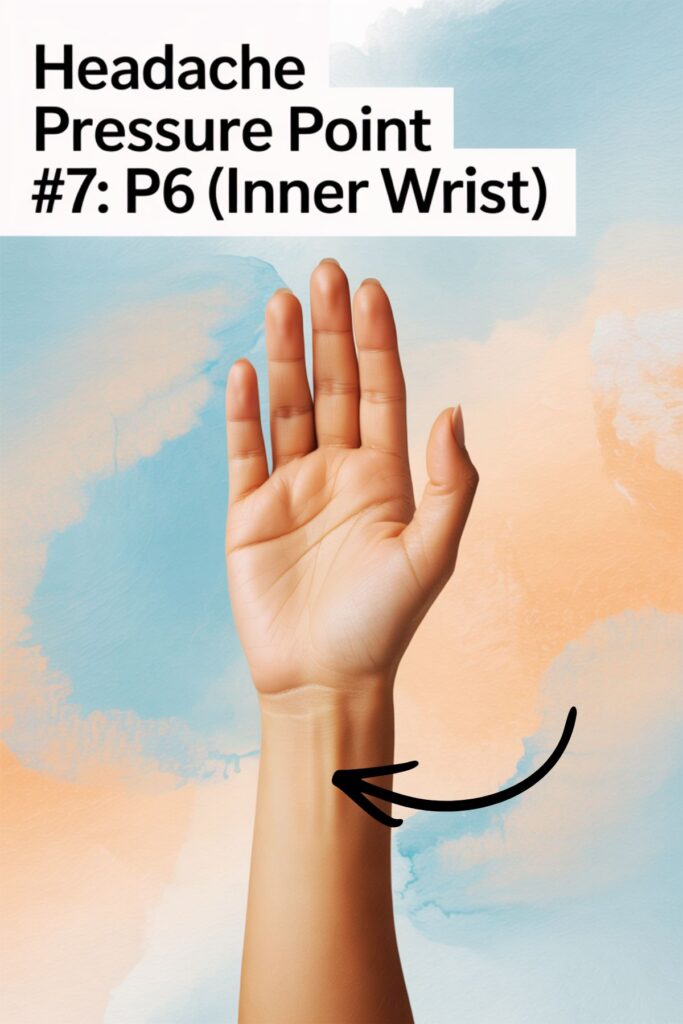
Pericardium 6, or Nei Guan, is the same point targeted by those seasickness wristbands. It’s on your inner wrist, three finger-widths below the wrist crease, between the two tendons.
How to find it: Turn your palm face up and place three fingers across your wrist just below the crease. The point is right below your third finger, between the two tendons.
How to use it: Press firmly with your thumb and hold for 30 to 60 seconds. Switch wrists.
Best for: Migraines with nausea, motion-sickness headaches, and general migraine pain. If you get migraines where the nausea is almost as bad as the head pain itself, this point is genuinely a game-changer.
Acupressure wristbands apply constant gentle pressure to this point and are worth keeping in your bag if you get frequent migraines.
What About the Daith and Daith Piercings?
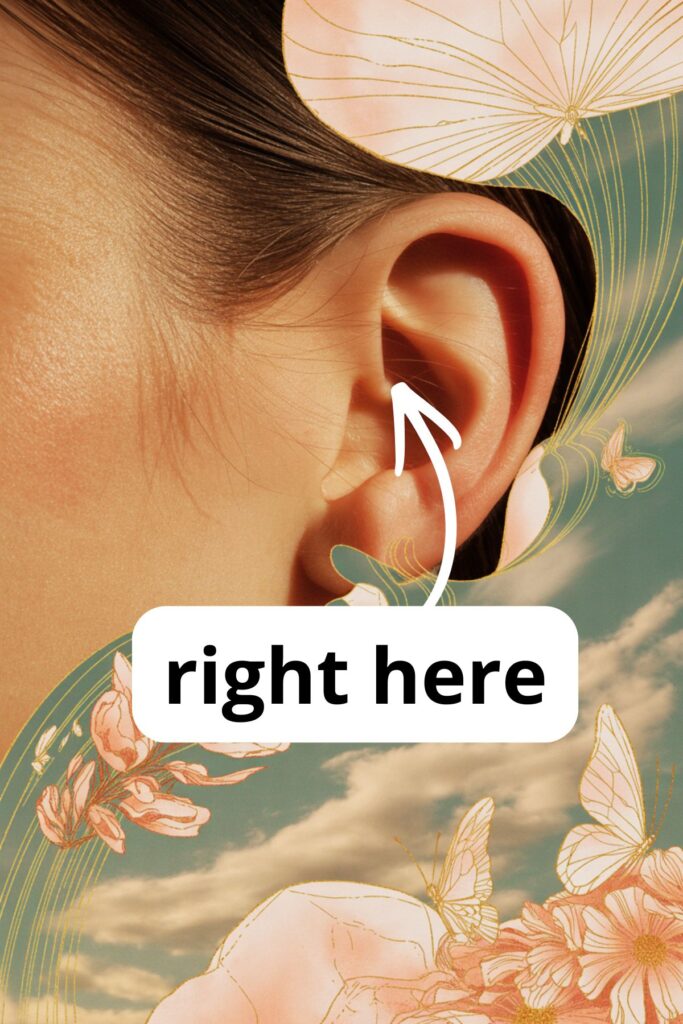
Since we’re talking pressure points and migraines, the daith deserves a mention. It’s a specific fold of cartilage in your inner ear that corresponds to an acupressure point used for migraine relief, and a daith piercing applies permanent pressure to that spot.
Many people report real migraine relief from it. If you want the full story on whether it actually works and everything you need to know before committing, the complete guide is right here.
The 10-Minute Headache SOS Routine
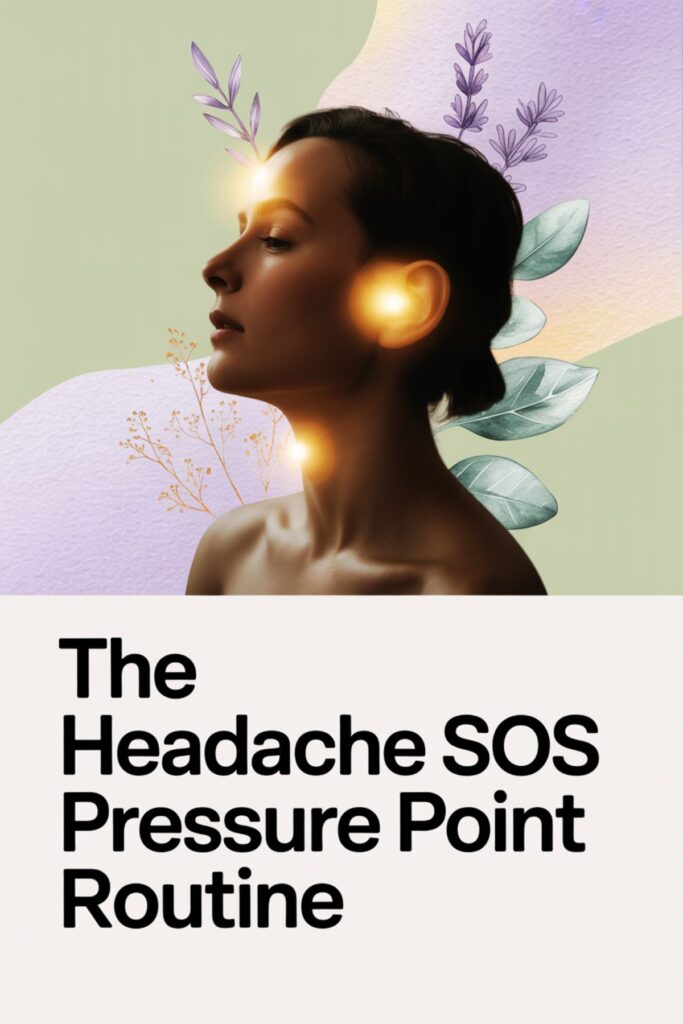
This is where it all comes together. The next time a headache hits, run through this sequence. It takes about 10 minutes and it works best if you can lie down or sit somewhere quiet.
- Mix your peppermint blend (2 drops peppermint essential oil + 1 tsp carrier oil) and apply to your temples and the back of your neck.
- Start with GB20 (base of skull), both sides simultaneously, 60 seconds.
- Move to LI4 (hand webbing), 60 seconds each hand. Apply your peppermint blend here too.
- Press Yintang (between brows) for 60 seconds. Use a drop of lavender oil on your finger first.
- If you have sinus pressure or congestion, add ST3 (cheekbones) for 30 seconds each side.
- For migraines specifically, add LV3 (top of foot) for 60 seconds each foot.
- If nausea is part of the picture, end with P6 (inner wrist) for 60 seconds each side.
Lie still for a few minutes after. Then drink a full glass of water. Dehydration is one of the sneakiest and most common headache triggers, and fixing it is completely free.
If you want to understand what type of headache you’re actually dealing with before you start, The Different Types of Headaches and the Relief for Each is a great place to start.
More Ways to Get Rid of Headaches Naturally
There’s a lot more to explore when it comes to natural headache relief, from figuring out your specific headache type to full migraine relief strategies.
- How to Get Rid of a Headache: 12 Natural Remedies for Fast Headache Relief
- The Different Types of Headaches and the Relief for Each
- The Ultimate Guide to Migraine Relief (And How to Get Rid of One Fast)
- Does the Daith Piercing Actually Work for Migraine Relief? The Complete Guide
- Essential Oils for Headaches: The Natural Headache Remedies That Actually Work
Save this pin to remember these pressur points to relieve a headache!